메모
전체 예제 코드를 다운로드 하려면 여기 를 클릭 하십시오.
레전드 가이드 #
Matplotlib에서 범례를 유연하게 생성합니다.
이 범례 가이드는 에서 사용할 수 있는 설명서의 확장입니다
legend(). 이 가이드를 진행하기 전에 해당 설명서의 내용을 숙지하십시오.
이 가이드에서는 명확성을 위해 여기에 문서화된 몇 가지 일반적인 용어를 사용합니다.
- 범례 항목 #
범례는 하나 이상의 범례 항목으로 구성됩니다. 항목은 정확히 하나의 키와 하나의 레이블로 구성됩니다.
- 범례 키 #
각 범례 레이블 왼쪽에 있는 색상/패턴 마커입니다.
- 범례 레이블 #
키가 나타내는 핸들을 설명하는 텍스트입니다.
- 범례 핸들 #
범례에서 적절한 항목을 생성하는 데 사용되는 원본 개체입니다.
범례 항목 제어 #
인수 없이 호출 legend()하면 범례 핸들과 관련 레이블을 자동으로 가져옵니다. 이 기능은 다음과 동일합니다.
handles, labels = ax.get_legend_handles_labels()
ax.legend(handles, labels)
이 get_legend_handles_labels()함수는 결과 범례에 대한 항목을 생성하는 데 사용할 수 있는 Axes에 존재하는 핸들/아티스트 목록을 반환합니다. 그러나 모든 아티스트를 범례에 추가할 수 있는 것은 아니며 "프록시"가 생성해야 합니다(자세한 내용 은 범례에 추가하기 위한 아티스트 만들기(일명 프록시 아티스트) 참조).
메모
레이블이 빈 문자열이거나 밑줄 "_"로 시작하는 레이블이 있는 아티스트는 무시됩니다.
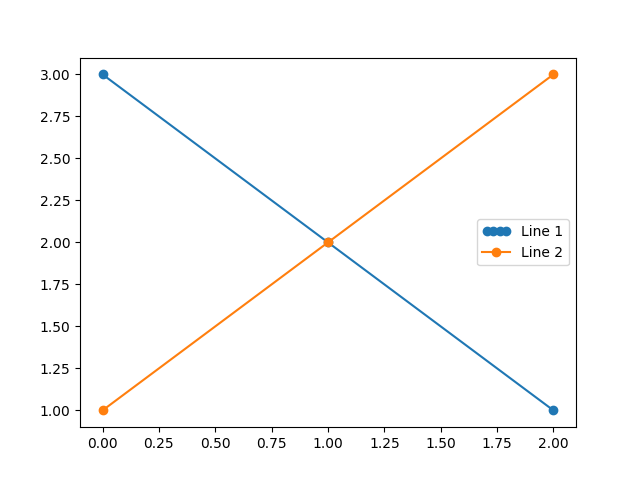
범례에 추가되는 항목을 완전히 제어하려면 적절한 핸들을 다음에 직접 전달하는 것이 일반적입니다 legend().
fig, ax = plt.subplots()
line_up, = ax.plot([1, 2, 3], label='Line 2')
line_down, = ax.plot([3, 2, 1], label='Line 1')
ax.legend(handles=[line_up, line_down])
경우에 따라 핸들의 레이블을 설정할 수 없으므로 다음과 같이 레이블 목록을 전달할 수 있습니다 legend().
fig, ax = plt.subplots()
line_up, = ax.plot([1, 2, 3], label='Line 2')
line_down, = ax.plot([3, 2, 1], label='Line 1')
ax.legend([line_up, line_down], ['Line Up', 'Line Down'])
전설에 추가하기 위해 특별히 아티스트 만들기(일명 프록시 아티스트) #
모든 핸들이 자동으로 범례 항목으로 전환될 수 있는 것은 아니므로 종종 . 범례 핸들을 사용하기 위해 Figure 또는 Axes에 존재할 필요는 없습니다.
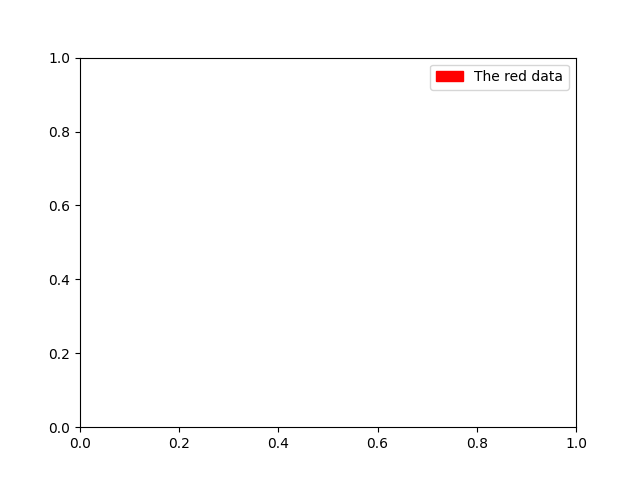
빨간색으로 표시되는 일부 데이터에 대한 항목이 있는 범례를 만들고 싶다고 가정합니다.
import matplotlib.patches as mpatches
import matplotlib.pyplot as plt

fig, ax = plt.subplots()
red_patch = mpatches.Patch(color='red', label='The red data')
ax.legend(handles=[red_patch])

plt.show()
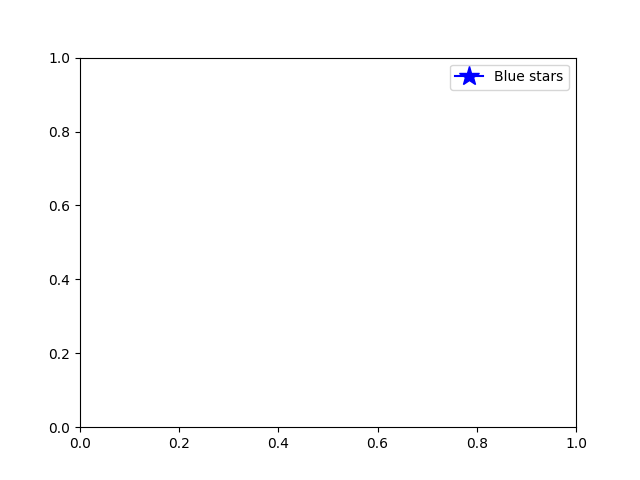
지원되는 범례 핸들이 많이 있습니다. 색상 패치를 만드는 대신 마커가 있는 선을 만들 수 있습니다.
import matplotlib.lines as mlines

fig, ax = plt.subplots()
blue_line = mlines.Line2D([], [], color='blue', marker='*',
                          markersize=15, label='Blue stars')
ax.legend(handles=[blue_line])

plt.show()
범례 위치 #
범례의 위치는 키워드 인수 loc 로 지정할 수 있습니다
. 자세한 내용은 설명서 legend()를 참조하십시오.
bbox_to_anchor키워드는 수동 범례 배치에 대해 상당한 수준의 제어를 제공합니다 . 예를 들어 좌표축의 모서리 대신 Figure의 오른쪽 상단 모서리에 좌표축 범례를 배치하려면 모서리의 위치와 해당 위치의 좌표계를 지정하기만 하면 됩니다.
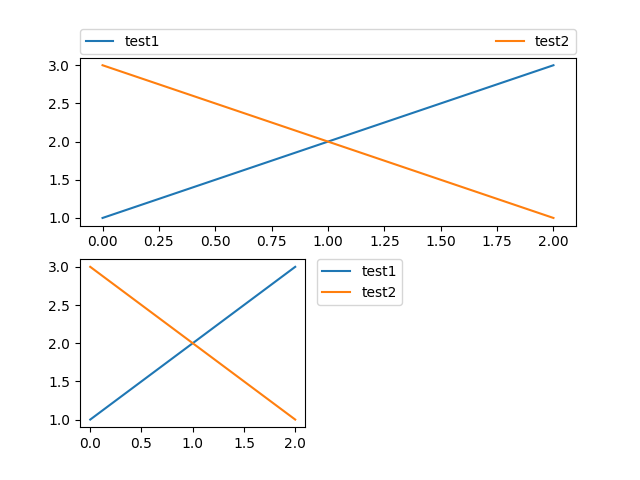
사용자 지정 범례 배치의 추가 예:
fig, ax_dict = plt.subplot_mosaic([['top', 'top'], ['bottom', 'BLANK']],
                                  empty_sentinel="BLANK")
ax_dict['top'].plot([1, 2, 3], label="test1")
ax_dict['top'].plot([3, 2, 1], label="test2")
# Place a legend above this subplot, expanding itself to
# fully use the given bounding box.
ax_dict['top'].legend(bbox_to_anchor=(0., 1.02, 1., .102), loc='lower left',
                      ncol=2, mode="expand", borderaxespad=0.)

ax_dict['bottom'].plot([1, 2, 3], label="test1")
ax_dict['bottom'].plot([3, 2, 1], label="test2")
# Place a legend to the right of this smaller subplot.
ax_dict['bottom'].legend(bbox_to_anchor=(1.05, 1),
                         loc='upper left', borderaxespad=0.)

plt.show()
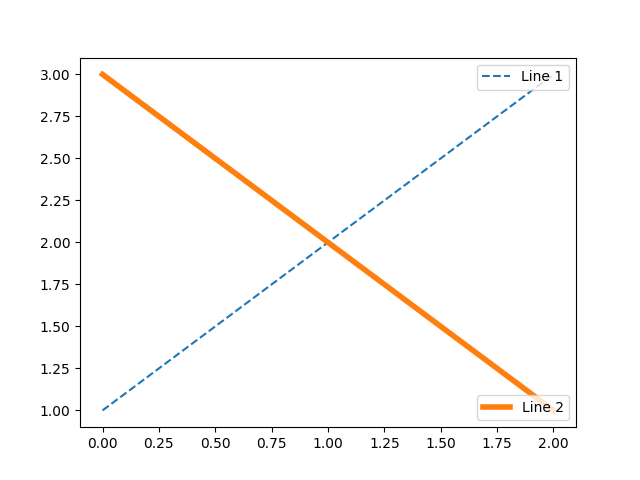
동일한 축의 여러 범례 #
경우에 따라 범례 항목을 여러 범례에 걸쳐 분할하는 것이 더 명확합니다. 이 작업을 수행하는 본능적인 접근 방식은 legend()함수를 여러 번 호출하는 것일 수 있지만 Axes에는 하나의 범례만 존재한다는 것을 알 수 있습니다. legend()범례를 Axes의 최신 핸들로 업데이트하기 위해 반복적으로 호출할 수 있도록 이렇게 했습니다 . 오래된 범례 인스턴스를 유지하려면 Axes에 수동으로 추가해야 합니다.
fig, ax = plt.subplots()
line1, = ax.plot([1, 2, 3], label="Line 1", linestyle='--')
line2, = ax.plot([3, 2, 1], label="Line 2", linewidth=4)

# Create a legend for the first line.
first_legend = ax.legend(handles=[line1], loc='upper right')

# Add the legend manually to the Axes.
ax.add_artist(first_legend)

# Create another legend for the second line.
ax.legend(handles=[line2], loc='lower right')

plt.show()
범례 처리기 #
범례 항목을 만들기 위해 적절한 HandlerBase하위 클래스에 대한 인수로 핸들이 제공됩니다. 처리기 하위 클래스의 선택은 다음 규칙에 따라 결정됩니다.
키워드
get_legend_handler_map()의 값으로 업데이트 합니다.handler_maphandle가 새로 생성된 에 있는지 확인합니다handler_map.의 유형이
handle새로 생성된 에 있는지 확인하십시오handler_map.handle의 mro 에 있는 유형이 새로 생성된 파일에 있는지 확인하십시오handler_map.
완벽을 기하기 위해 이 로직은 대부분
get_legend_handler().
이러한 모든 유연성은 우리 고유의 범례 키 유형에 대한 사용자 지정 처리기를 구현하는 데 필요한 후크가 있음을 의미합니다.
사용자 지정 처리기를 사용하는 가장 간단한 예는 기존 legend_handler.HandlerBase하위 클래스 중 하나를 인스턴스화하는 것입니다. 단순화를 위해 numpointslegend_handler.HandlerLine2D 인수
를 허용하는 것을 선택해 보겠습니다 (numpoints는 편의를 위해 함수의 키워드이기도 합니다). 그런 다음 핸들러에 대한 인스턴스 매핑을 범례에 대한 키워드로 전달할 수 있습니다.legend()
from matplotlib.legend_handler import HandlerLine2D

fig, ax = plt.subplots()
line1, = ax.plot([3, 2, 1], marker='o', label='Line 1')
line2, = ax.plot([1, 2, 3], marker='o', label='Line 2')

ax.legend(handler_map={line1: HandlerLine2D(numpoints=4)})
<matplotlib.legend.Legend object at 0x7f2cf9a16ef0>
보시다시피 "Line 1"에는 이제 4개의 마커 포인트가 있고 "Line 2"에는 2개(기본값)가 있습니다. 위의 코드를 시도하고 맵의 키만 에서 line1로
변경하십시오 type(line1). 이제 두 Line2D인스턴스가 어떻게 4개의 마커를 받는지 확인하십시오.
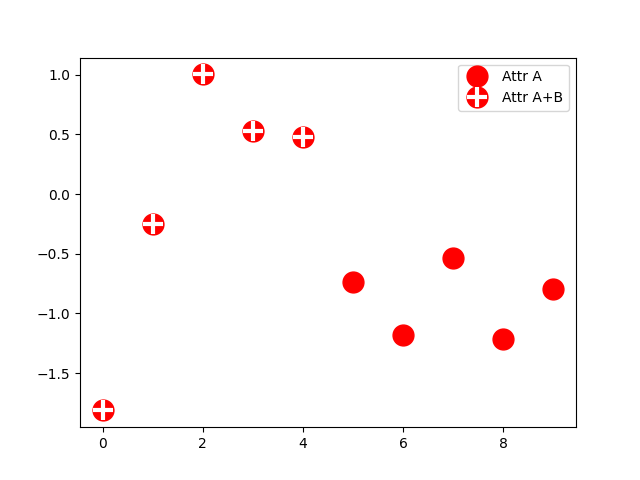
오류 막대, 줄기 플롯 및 히스토그램과 같은 복잡한 플롯 유형에 대한 핸들러와 함께 기본값 에는 주어진 튜플의 각 항목에 대해 핸들을 서로 위에 간단히 플롯 handler_map하는 특수 tuple핸들러( )가 있습니다. legend_handler.HandlerTuple다음 예제에서는 두 개의 범례 키를 서로 결합하는 방법을 보여줍니다.
from numpy.random import randn

z = randn(10)

fig, ax = plt.subplots()
red_dot, = ax.plot(z, "ro", markersize=15)
# Put a white cross over some of the data.
white_cross, = ax.plot(z[:5], "w+", markeredgewidth=3, markersize=15)

ax.legend([red_dot, (red_dot, white_cross)], ["Attr A", "Attr A+B"])
<matplotlib.legend.Legend object at 0x7f2cfb693760>
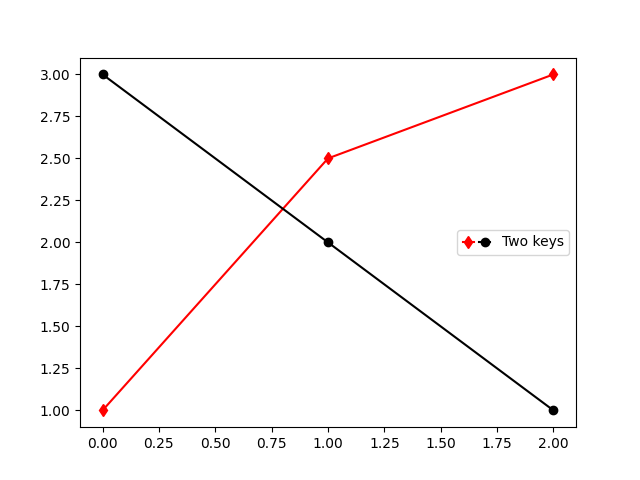
legend_handler.HandlerTuple클래스를 사용하여 동일한 항목에 여러 범례 키를 할당할 수도 있습니다 .
from matplotlib.legend_handler import HandlerLine2D, HandlerTuple

fig, ax = plt.subplots()
p1, = ax.plot([1, 2.5, 3], 'r-d')
p2, = ax.plot([3, 2, 1], 'k-o')

l = ax.legend([(p1, p2)], ['Two keys'], numpoints=1,
              handler_map={tuple: HandlerTuple(ndivide=None)})
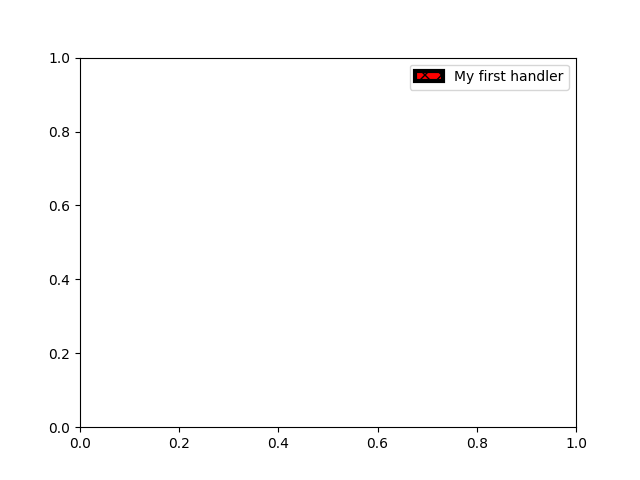
사용자 지정 범례 처리기 구현 #
임의의 핸들을 범례 키로 바꾸도록 사용자 정의 핸들러를 구현할 수 있습니다(핸들이 반드시 matplotlib 아티스트일 필요는 없음). 처리기는 legend_artist사용할 범례에 대해 단일 아티스트를 반환하는 메서드를 구현해야 합니다. 에 필요한 서명 legend_artist은 에 설명되어
legend_artist있습니다.
import matplotlib.patches as mpatches


class AnyObject:
    pass


class AnyObjectHandler:
    def legend_artist(self, legend, orig_handle, fontsize, handlebox):
        x0, y0 = handlebox.xdescent, handlebox.ydescent
        width, height = handlebox.width, handlebox.height
        patch = mpatches.Rectangle([x0, y0], width, height, facecolor='red',
                                   edgecolor='black', hatch='xx', lw=3,
                                   transform=handlebox.get_transform())
        handlebox.add_artist(patch)
        return patch

fig, ax = plt.subplots()

ax.legend([AnyObject()], ['My first handler'],
          handler_map={AnyObject: AnyObjectHandler()})
<matplotlib.legend.Legend object at 0x7f2cddb26a10>
또는 항상 handler_mapAnyObject 키워드 를 수동으로 설정할 필요 없이 전역적으로 인스턴스를 수락하고 싶었다 면 다음을 사용하여 새 핸들러를 등록할 수 있었습니다.
from matplotlib.legend import Legend
Legend.update_default_handler_map({AnyObject: AnyObjectHandler()})
여기에 있는 기능은 분명하지만 이미 많은 처리기가 구현되어 있고 달성하려는 것이 이미 기존 클래스로 쉽게 가능할 수 있음을 기억하십시오. 예를 들어 직사각형 범례 키가 아닌 타원형 범례 키를 생성하려면 다음을 수행하십시오.
from matplotlib.legend_handler import HandlerPatch


class HandlerEllipse(HandlerPatch):
    def create_artists(self, legend, orig_handle,
                       xdescent, ydescent, width, height, fontsize, trans):
        center = 0.5 * width - 0.5 * xdescent, 0.5 * height - 0.5 * ydescent
        p = mpatches.Ellipse(xy=center, width=width + xdescent,
                             height=height + ydescent)
        self.update_prop(p, orig_handle, legend)
        p.set_transform(trans)
        return [p]


c = mpatches.Circle((0.5, 0.5), 0.25, facecolor="green",
                    edgecolor="red", linewidth=3)

fig, ax = plt.subplots()

ax.add_patch(c)
ax.legend([c], ["An ellipse, not a rectangle"],
          handler_map={mpatches.Circle: HandlerEllipse()})
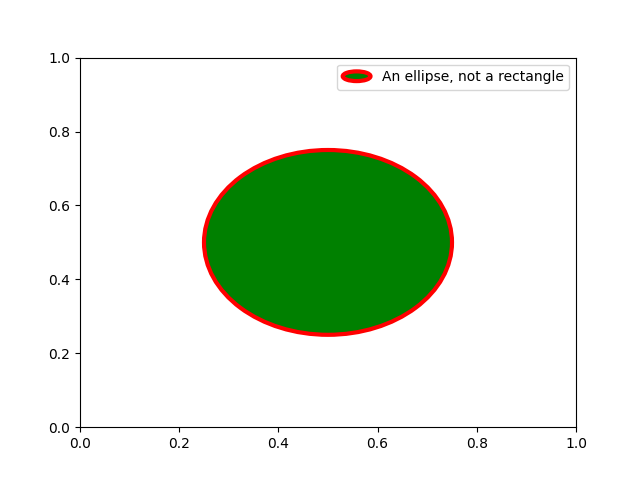
<matplotlib.legend.Legend object at 0x7f2d00dde710>
스크립트의 총 실행 시간: (0분 3.053초)