메모
전체 예제 코드를 다운로드 하려면 여기 를 클릭 하십시오.
확대 창 #
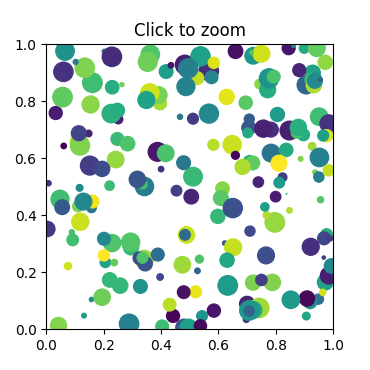
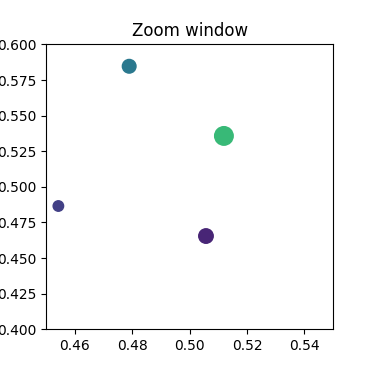
이 예제에서는 한 창의 이벤트(예: 마우스 누르기)를 다른 Figure 창에 연결하는 방법을 보여줍니다.
첫 번째 창에서 한 지점을 클릭하면 두 번째 창의 확대/축소 중심이 클릭한 지점의 (x, y) 좌표가 되도록 두 번째 창의 z 및 y 제한이 조정됩니다.
산란에 있는 원의 직경은 포인트**2로 정의되므로 크기는 확대/축소와 무관합니다.
메모
이 예제는 Matplotlib의 대화형 기능을 실행하며 정적 문서에는 나타나지 않습니다. 상호 작용을 보려면 컴퓨터에서 이 코드를 실행하십시오.
개별 부분을 복사하여 붙여넣거나 페이지 하단의 링크를 사용하여 전체 예제를 다운로드할 수 있습니다.
import matplotlib.pyplot as plt
import numpy as np


# Fixing random state for reproducibility
np.random.seed(19680801)

figsrc, axsrc = plt.subplots(figsize=(3.7, 3.7))
figzoom, axzoom = plt.subplots(figsize=(3.7, 3.7))
axsrc.set(xlim=(0, 1), ylim=(0, 1), autoscale_on=False,
          title='Click to zoom')
axzoom.set(xlim=(0.45, 0.55), ylim=(0.4, 0.6), autoscale_on=False,
           title='Zoom window')

x, y, s, c = np.random.rand(4, 200)
s *= 200

axsrc.scatter(x, y, s, c)
axzoom.scatter(x, y, s, c)


def on_press(event):
    if event.button != 1:
        return
    x, y = event.xdata, event.ydata
    axzoom.set_xlim(x - 0.1, x + 0.1)
    axzoom.set_ylim(y - 0.1, y + 0.1)
    figzoom.canvas.draw()

figsrc.canvas.mpl_connect('button_press_event', on_press)
plt.show()

